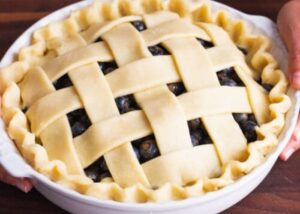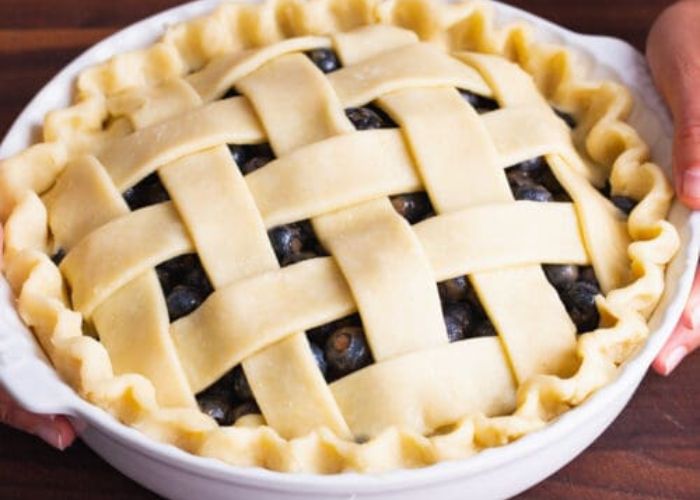
An irresistible feature of a well-baked pie is its golden, flaky crust that cracks when a fork is inserted. It has long been believed that making the ideal pie crust is an art form that should only be attempted by those with extensive baking experience or who possess a well-guarded family recipe.
Rest assured, though! If you want to take the intimidation factor out of pie making, Natasha has the ideal crust recipe. Even a novice baker may master Natasha’s famed pie crust with the aid of this comprehensive guide. Let’s read below “How do you make Natasha’s pie crust recipe?’
Ingredients for Natasha’s pie crust recipe
To begin your journey towards pie perfection, gather the following ingredients:
- 2 1/2 cups all-purpose flour
- 1 cup unsalted butter (cold and cubed)
- 1 teaspoon salt
- 1 teaspoon sugar
- 1/4 to 1/2 cup ice water
How do you make Natasha’s pie crust recipe?
Step 1: Assemble Your Ingredients and Tools
Gather all of your ingredients and cooking tools in advance and set them out on the counter. In addition to the components already listed, you’ll need a food processor, rolling pin, mixing bowl, plastic wrap, and all of the aforementioned equipment to prepare Natasha’s pie crust.
The butter must be cooled completely before using it to provide a flaky crust. If you haven’t done so already, cut the butter into cubes and store them in the fridge.
Step 2: Combine Dry Ingredients
Start by whisking the all-purpose flour, sugar, and salt together in a bowl. The delicate sweetness of sugar and the enhancing flavour of salt work well with both sweet and savoury ingredients. Ingredients like these form the basis of a well-balanced crust.
Step 3: Cut in the Butter
When the butter has cooled to room temperature, combine it with the dry ingredients in the food processor. Combine the ingredients and pulse until a coarse crumb consistency is achieved. Toss the flour with the butter in small pieces, approximately the size of peas. The uneven distribution of fat causes the crust to have flaky layers.
Step 4: Add Ice Water
While the food processor is operating, slowly add the ice water through the feed line. Feel free to adjust the amount as needed; 1/4 cup is an excellent benchmark. For the dough to come together, it is essential to add just the correct amount of water. Avoid overmixing the dough unless you want it to appear slightly crumbly.
Step 5: Form the Dough
After lightly oiling and flouring a surface, transfer the dough to that surface. Combine the crumbly ingredients and mix gently to form a ball. After you shape the dough into discs, divide it in half and wrap each half separately. Chilling the dough for at least an hour will allow the gluten to soften and the butter to set.
Step 6: Roll Out the Dough
Remove a single disc of chilled dough from the refrigerator and let it cool for a few minutes. Turn the dough over occasionally to prevent it from sticking as you roll it out into a circle on a floured surface. The circle should be somewhat larger than the pie plate, but larger than what is needed to cover the base.
Step 7: Transfer to Pie Dish
Be cautious not to drop the rolling pin as you delicately wrap the rolled-out dough over the pie plate. When pushing the dough into the bottom and sides of the dish, be careful not to create any air pockets. Use a sharp knife to trim the excess and use the leftover material to strengthen any areas that are too thin.
Step 8: Chill Again
Just give the pie crust a 15 to 30 minute chill in the fridge. This additional chilling helps to prevent any shrinkage that may occur during baking.
Step 9: Preheat and Blind Bake
Preheating the oven to the temperature specified in the recipe is an important step before baking the pie. Simply blind bake the cooled crust before adding the filling to make a blind baked crust. Lining the crust with parchment paper and filling it with dry beans or pie weights can prevent the crust from puffing up. After 15 minutes, remove the parchment paper and weights from the crust and continue baking for another 15 minutes, or until it begins to develop a golden brown colour.
Step 10: Repeat for the Top Crust
Roll out and refrigerate a second disc of dough if you wish to make a top crust for your pie. After prebaking the bottom crust, add the filling. Finally, bake the top crust. Trim and crimp the edges to create a seal.
Step 11: Bake to Perfection
Be sure to check your pie recipe for the precise baking directions, as some recipes ask for different temperatures and timings. Use foil to cover the crust’s edges if it’s browning too quickly. Maintain vigilance. The finished product should be a golden, flaky crust that complements your filling of choice.
Conclusion
Great job! You appear to have perfected Natasha’s pie crust recipe. Your meticulous planning and execution have set the stage for a pie with a crust that will tantalise the taste buds. Regardless of your degree of culinary expertise, mastering pie crust is an incredibly satisfying accomplishment that will undoubtedly elevate your baking abilities. For the perfect pie, get your hands filthy, gather all your favourite pie recipes, and be sure to follow Natasha’s crust recipe precisely. Embrace the culinary experience! I hope you like reading “How do you make Natasha’s pie crust recipe?”
The Best Cookware for Perfect Results
Having the right cookware and tools can make all the difference in achieving that perfect, flaky crust. Here’s a list of the best cookware and tools we recommend for this recipe:
- Food Processor: This tool is crucial for evenly distributing the butter throughout the dough, which is key to a flaky crust. We recommend the KitchenAid KFC3516IC 3.5 Cup Food Chopper.
- Rolling Pin: A must-have for rolling out the dough evenly. A wooden rolling pin offers good control and consistent pressure, which helps in rolling the dough to the desired thickness without sticking. We recommend the Farberware 5215807 Classic Wood Rolling Pin, 17.75-Inch.
- Mixing Bowl: Used for initially whisking together the dry ingredients. A large, wide bowl is best to give you enough room to work without spilling. We recommend the Pyrex Smart Essentials 3-Piece Prepware Mixing Bowl Set, 1-Qt, 1.5-Qt ,and 2.5-Qt Glass Mixing Bowls.
- Plastic Wrap: Needed for wrapping and chilling the dough. The wrap should be tight enough to prevent air from getting in but not so tight that it squashes the dough.
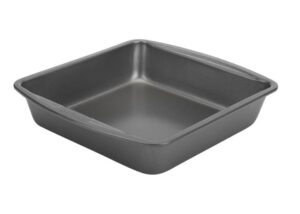
- Pie Dish: The final destination for your pie crust. A glass or ceramic pie dish is recommended because they conduct heat evenly, which helps the crust bake uniformly. We recommend the Pyrex 9 Inch – 23 Cm Pie Dish.
- Parchment Paper: Used along with pie weights or dry beans during the blind baking process to prevent the crust from puffing up and to achieve a flat, even surface for your filling.
- Pie Weights or Dry Beans: These are used for blind baking the crust to keep the shape of the pie shell and prevent it from rising or bubbling up.
- Sharp Knife: For trimming the excess dough from the edges of the pie dish. A sharp knife ensures a clean cut for a neat appearance. We recommend the McCook Knife Sets, German Stainless Steel Kitchen Knife Block Sets with Built-in Sharpener.
- Pastry Brush: If your recipe requires an egg wash or any other type of glaze on the crust, a pastry brush is essential for evenly applying the mixture.